# Create Firewalls
## Create Firewalls
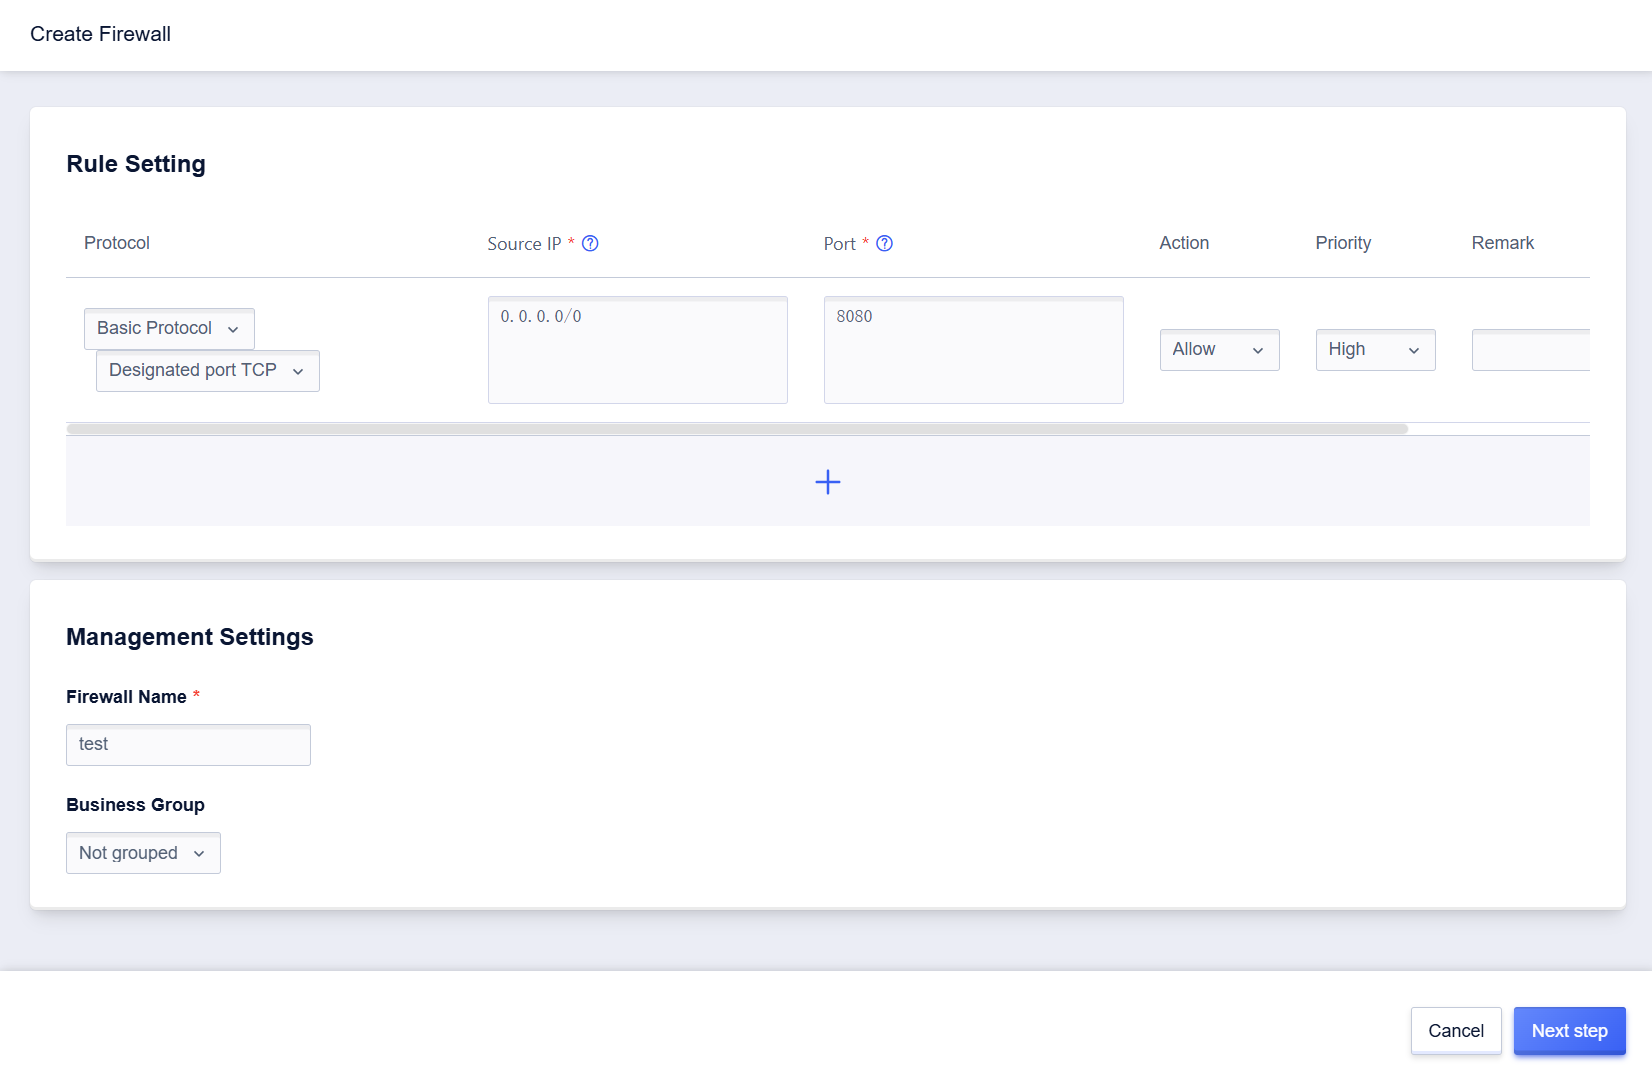
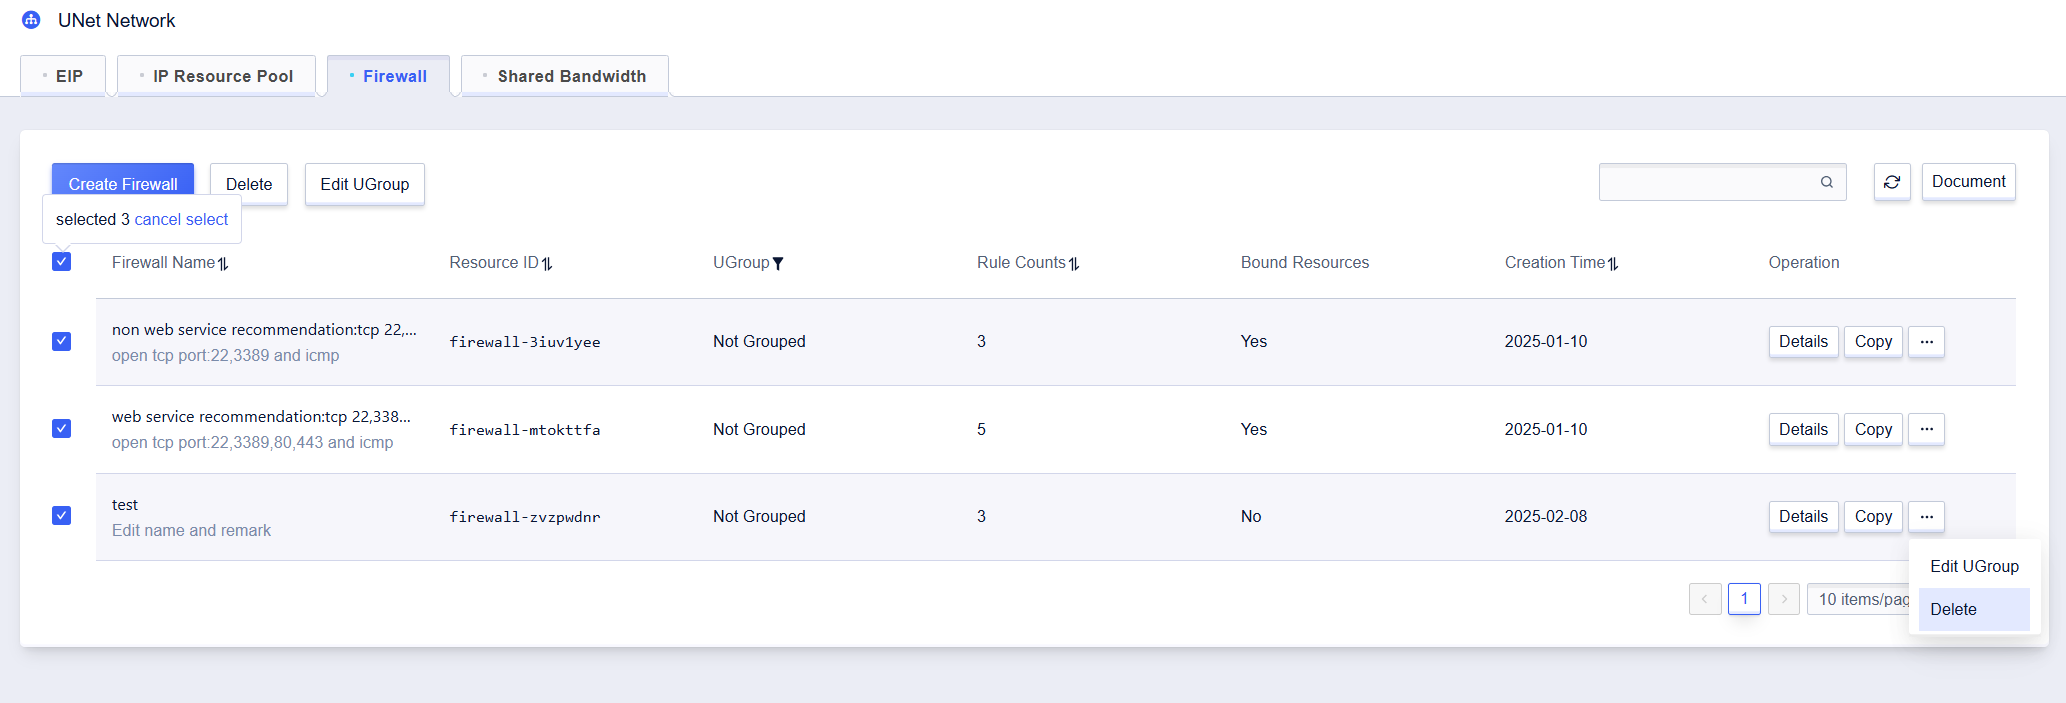
1. In **All Products** -> **UNet Network** -> **Firewall** page, click **Create Firewall** to create one.

2. On the creation page, configure firewall rules according to your business scenario, then click **Next step** to confirm the entered information.
3. Click **OK** to complete the creation of the firewall.

## Edit Firewall Rules
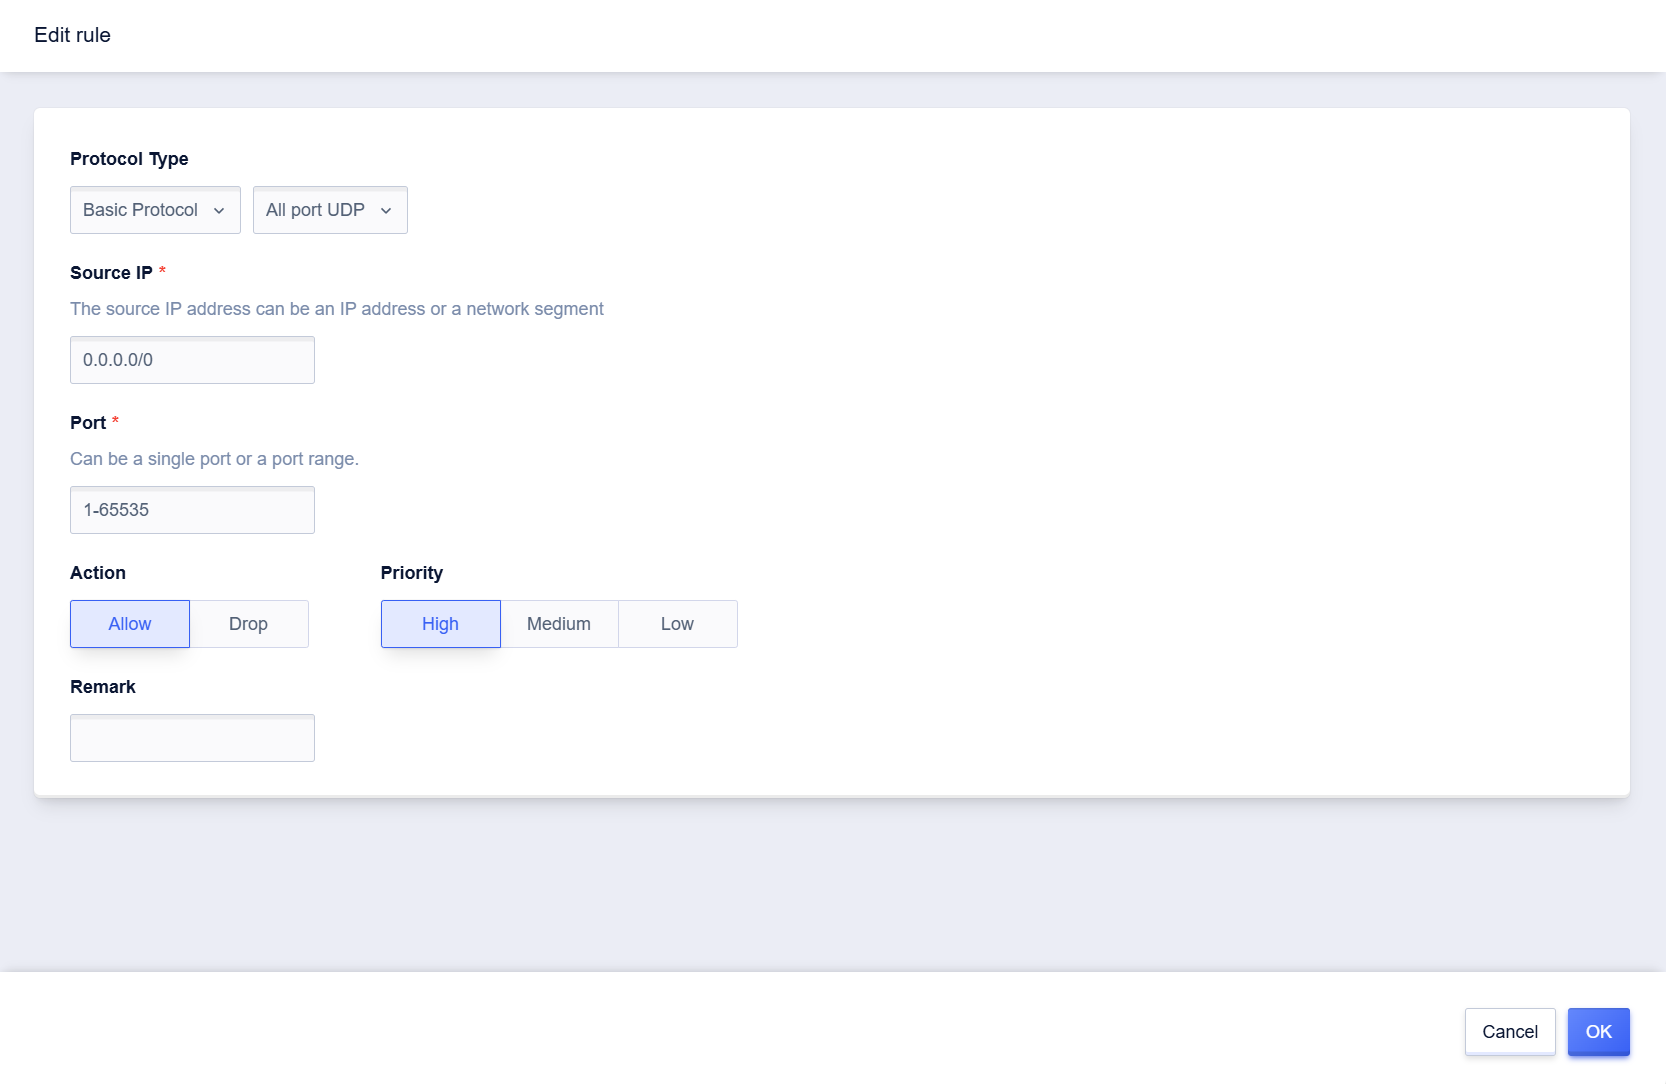
Currently, the firewall protocol supports "TCP", "UDP", "ICMP" and "GRE" protocols.
> - By default, the firewall rejects other accesses except for entered entries.
> - The firewall does not support duplicate rules. If the protocol, port, source address, and action are repeated, they are judged as duplicate rules. Duplicate rules will cause errors in operation.
1. On the firewall details page, select the firewall rules that need to be edited, configure according to the following information, and then click **OK**.
| Configuration | Description |
| --- | - |
| Basic Protocol | Specified TCP: User-defined TCP protocol port
Specified UDP: User-defined UDP protocol port
Full-Port TCP: All TCP ports
Full-Port UDP: All UDP ports
GRE: GRE Protocol
ICMP: ICMP Protocol |
| Quick Rule | FTP: TCP Port 21
HTTP: TCP Port 80
HTTPS: TCP Port 443
PING: ICMP Protocol
OpenVPN: UDP Port 1194
PPTP: TCP Port 1723
RDP: TCP Port 3389
SSH: TCP Port 22 |
| Port | The local ports accessed by the source address, with the port range of [1-65,535]. |
| Source IP | The source address of the network data package accessing the cloud platform host resources, supporting both IP address and network segment. IP address and network segment are separated by commas (supporting IP and network segment number ≤10), such as "10.0.0.1,192.168.0.2/32". |
| Action | When the firewall takes effect, it includes two actions for data package processing, namely "Accept" and "Reject". |
| Priority | When adding rules within the firewall, the rules are executed in order of priority. Each rule includes "High", "Medium" and "Low" levels. |
| Remark (Optional) | Remarks can be added to each rule for easy rule management and search. |
## Delete Firewall Rules
Both deletion of a single rule and batch deletion are supported.
> The firewall needs to keep at least one rule, so the "Delete" button is not available when all are selected.
1. On the firewall details page, select the firewall rule that needs to be edited and click **Delete** in the operation field. You can also select multiple firewall rules that need to be deleted and click **Delete**.
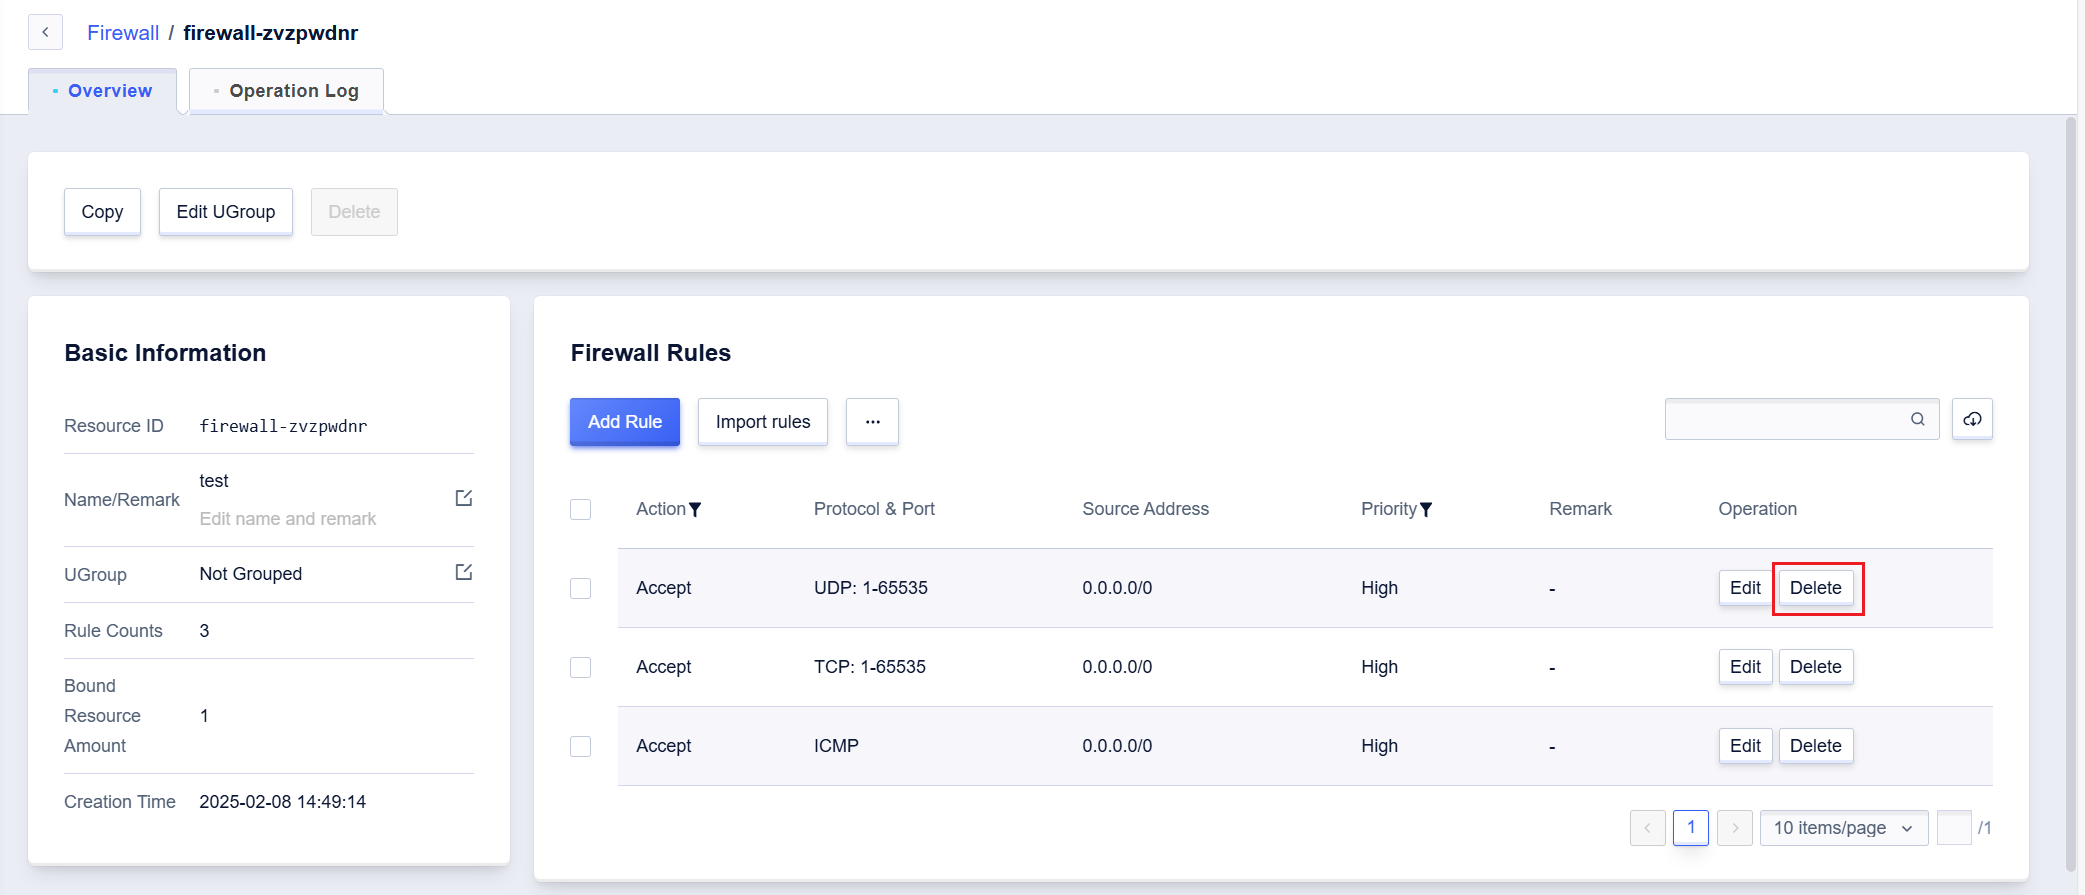
2. In the pop-up **Delete firewall rules** prompt box, click **Confirm** to complete the deletion of the firewall rule.
