# Create and Manage ALB Instances
ALB is a load balancing service specifically designed for Layer 7. By purchasing an ALB instance, you can distribute requests from clients to backend servers. This article describes how to create ALB instances.
# Create Instances
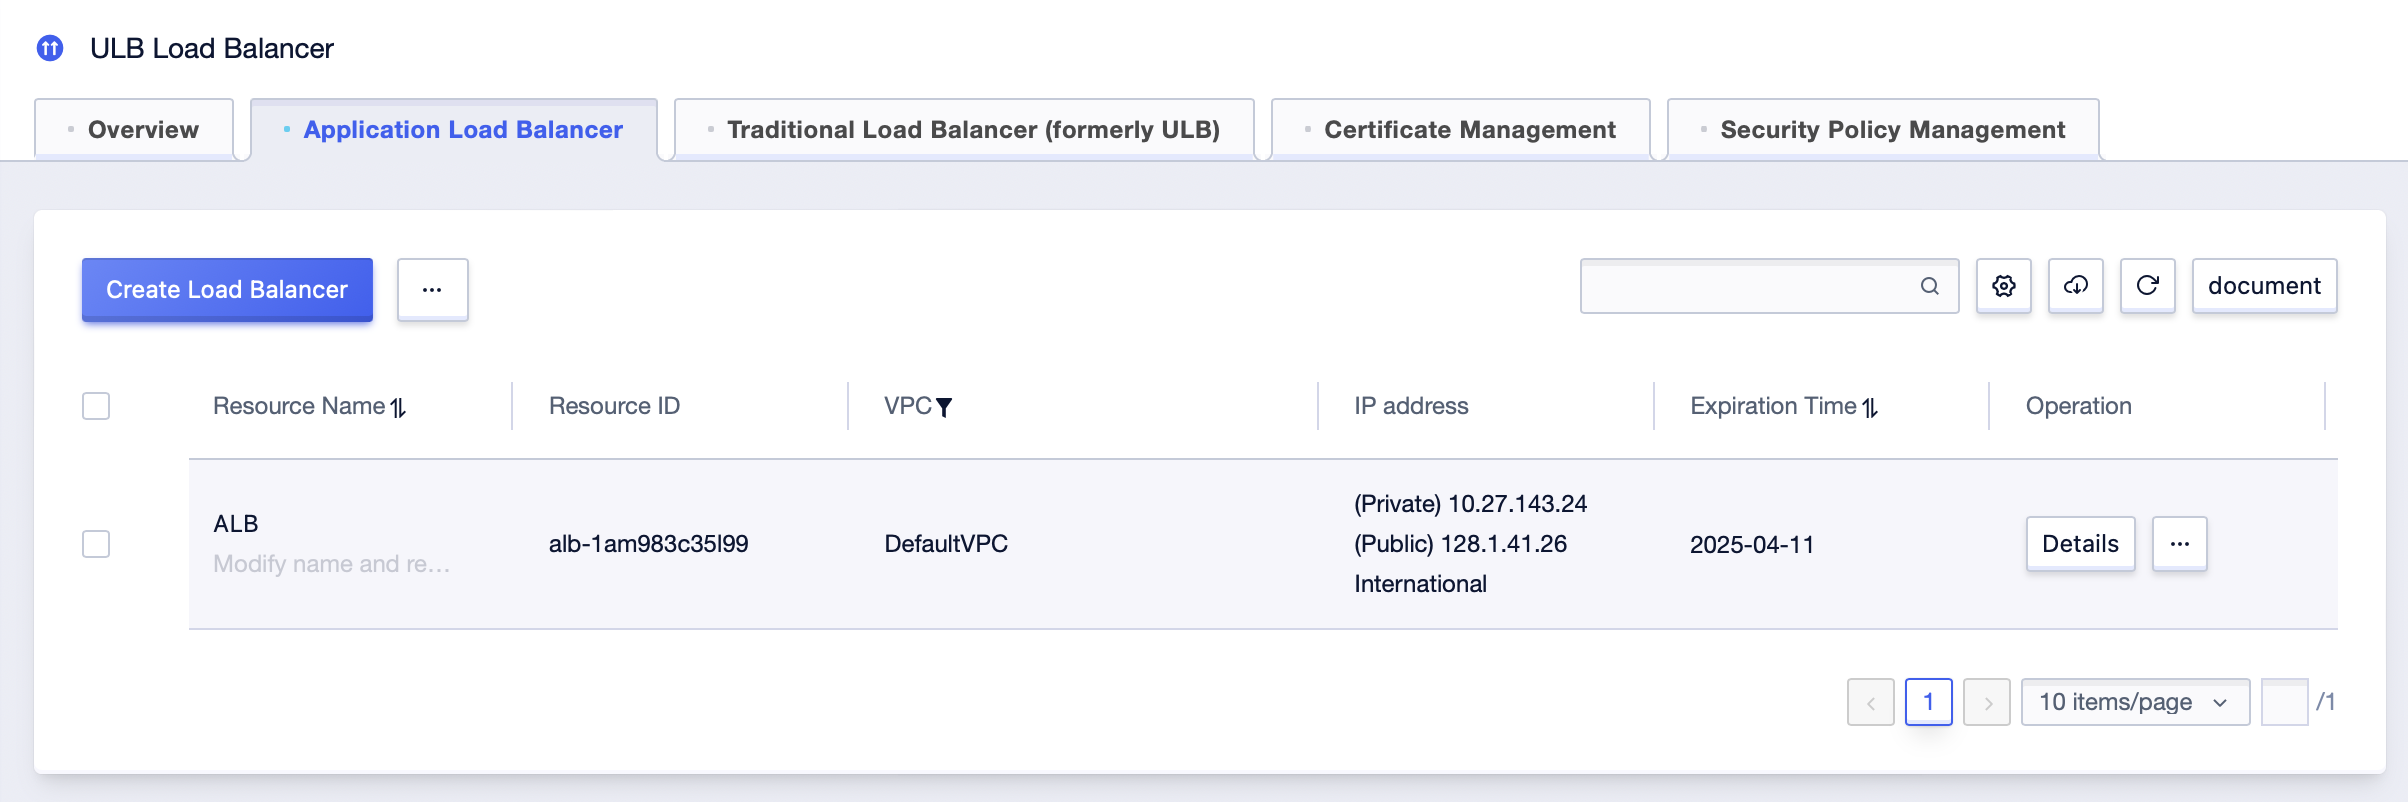
1. Log in to the ALB console.
2. On the list of instances, click **Create Load Balancer**.
3. On the **ALB** purchase page, complete the following configuration:
| Configuration | Description | Required |
| :--------- | :----------------------------------------------------------- | :------- |
| Region | Choose the region to which the instance belongs | Yes |
| Protocol Version | **IPv4**: The ALB instance supports only IPv4 address access from clients. | Yes |
| Associated VPC | Select the VPC to which the instance belongs | Yes |
| Associated Subnet | Select the subnet to which the instance belongs | Yes |
| Elastic Public IP | You can choose to create an Elastic IP with the current instance, or not choose an Elastic IP, and purchase and bind the Elastic IP after creating the instance | No |
| Firewall | Choose whether to bind a firewall | No |
| Instance Name | Enter a custom instance name | Yes |
| Business Group | Select the business group to which the ALB belongs | No |
| Payment Information | Select the payment method, and check product billing for details | Yes |
4. Click **Purchase Now** and follow the console prompts to complete the creation of the instance.
5. Return to the **Instance List** page, and select the corresponding region to see the newly created instance.
# Modify Instance Names and Remarks
Modifying the instance name can help you better manage your instances.
1. Log in to the ALB console.
2. At the top menu bar, select the region to which the instance belongs.
3. On the list of instances, choose the instance to be modified, move the cursor to the instance's name, and click on the "Modify" icon that pops up.
4. In the pop-up dialog box, modify the resource name and remarks, then click **OK**.
# Bind Elastic IPs
Binding Elastic IPs to add more public EIPs to your ALB instance.
1. Log in to the ALB console.
2. At the top menu bar, select the region to which the instance belongs.
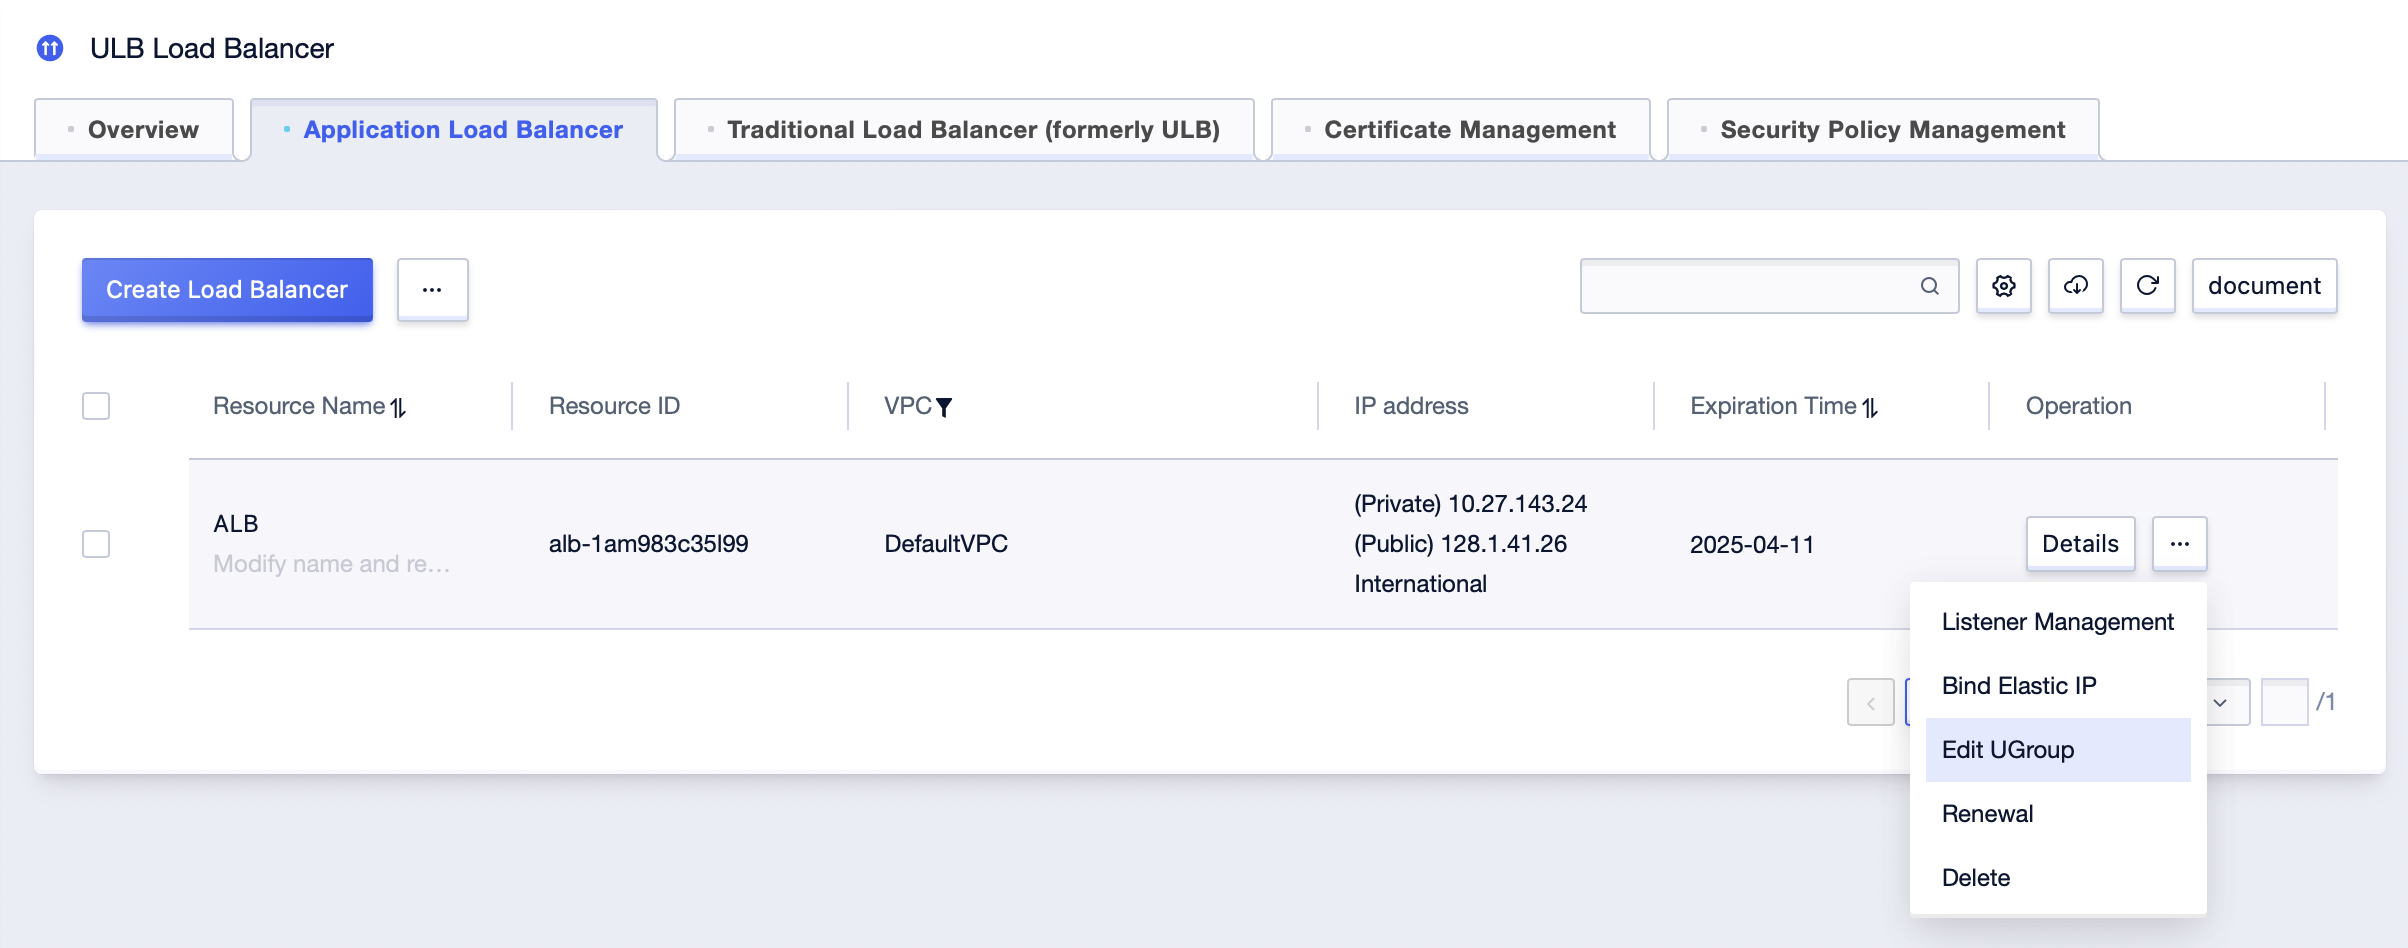
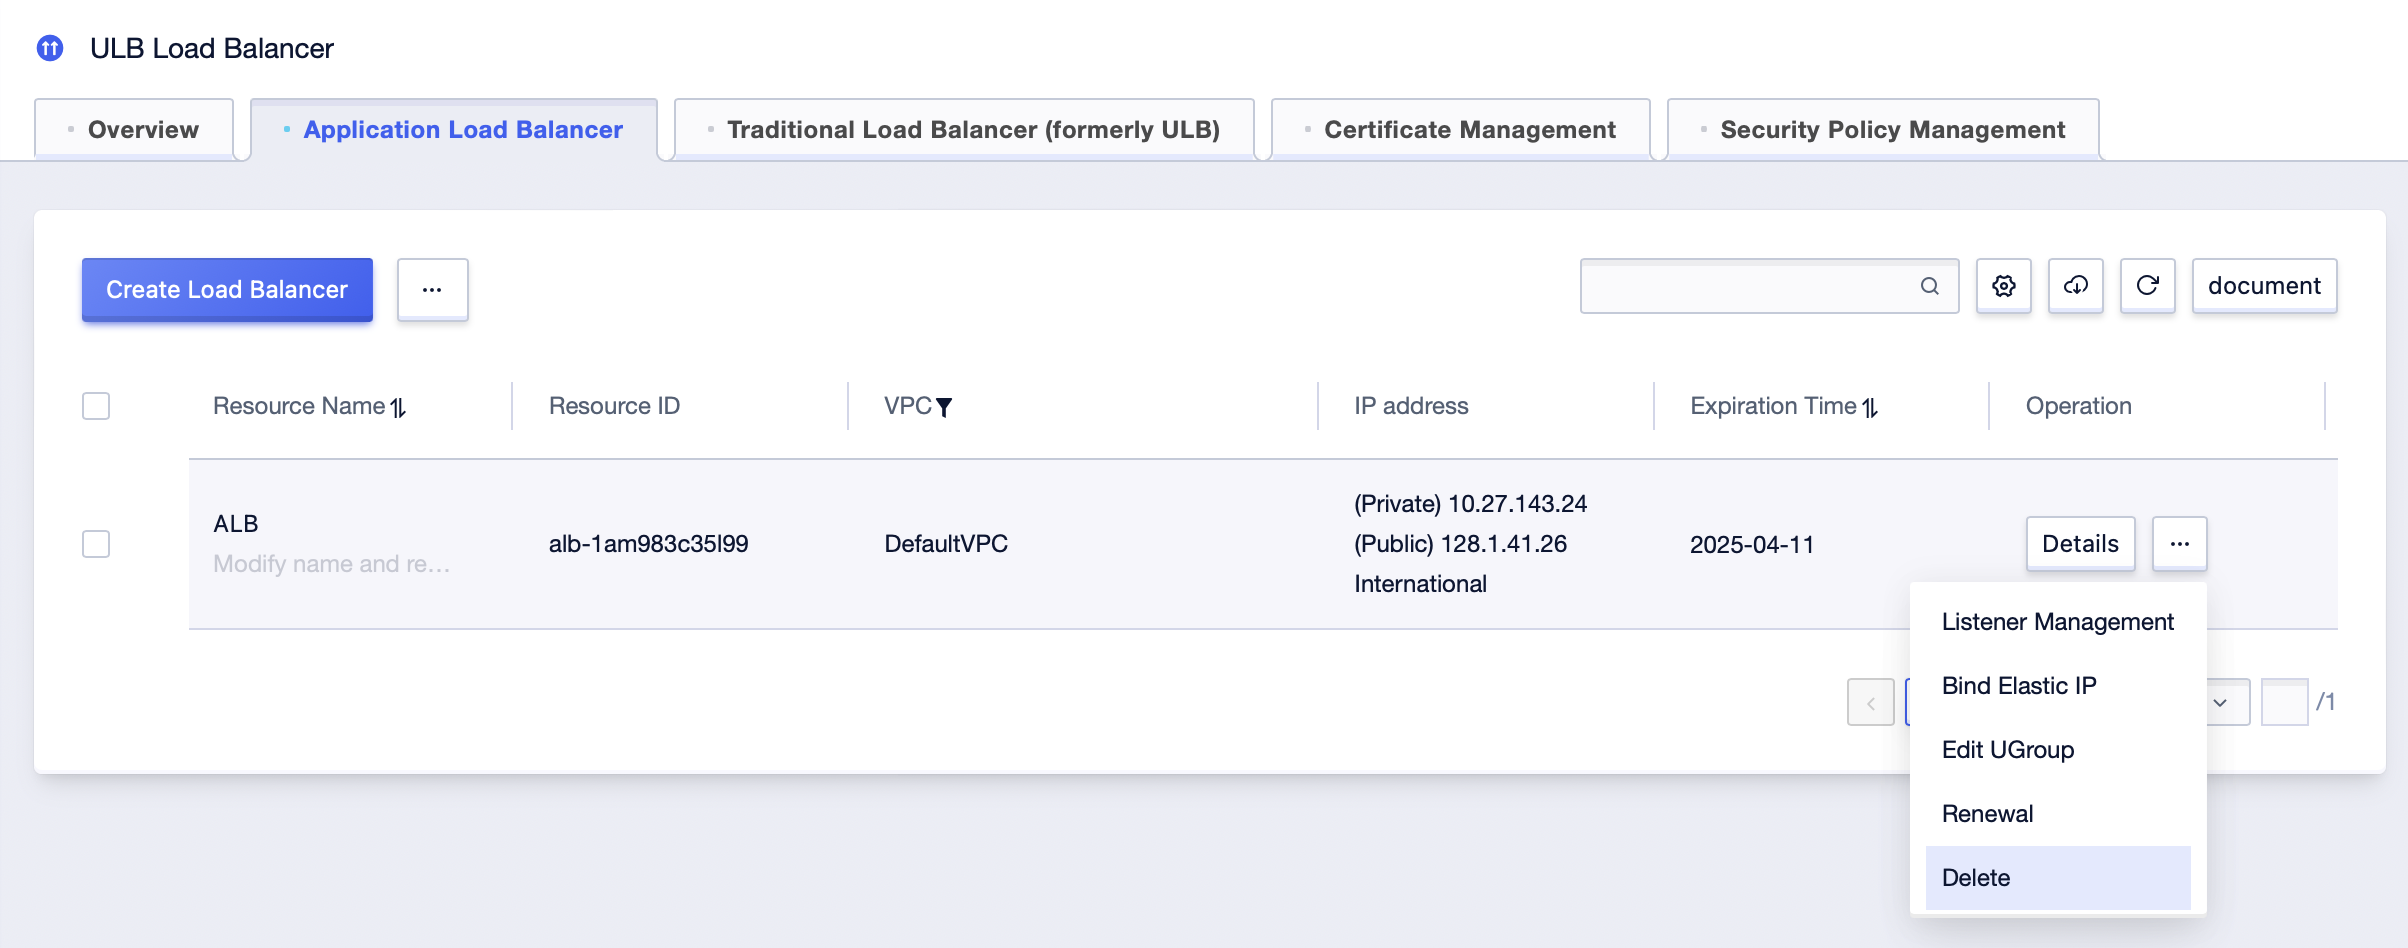
3. On the ALB **Instance** page, find the target instance, and then select **Bind Elastic IP** in the **Operation** column.

4. In the **Bind Elastic IP** dialog box, choose the EIP to be bound, and click **Confirm**.
# Change Business Groups
A business group can help you classify your load balancer instances, such as by business, use, etc.
1. Log in to the ALB console.
2. At the top menu bar, select the region to which the instance belongs.
3. On the ALB **Instance** page, find the target instance, and then select **Edit UGroup** in the **Operation** column.
4. In the **Edit UGroup** dialog box, select the target business group, and then click **Confirm**.
5. A load balancer instance can only be bound to one business group.
# Delete Instances
You can delete any load balancer instances you no longer need, to avoid extra bills.
1. Log in to the ALB console.
2. At the top menu bar, select the region to which the instance belongs.
3. On the ALB **Instance** page, find the target instance, and then select **Delete** in the **Operation** column.
4. In the **Delete Load Balancer** dialog, click **Confirm**.